Cashew Nut Cookies 1

A few years ago, just before hubby and I got married, we made our annual trip back to his hometown in Malaysia. There, my mother-in-law would often have a shoebox filled with newspaper cuttings reserved for us. Occasionally, she will call me down to her kitchen and show me more newspaper clippings, usually recipes that she wanted to try but does not have the time or opportunity and would then stuff the clippings in one of her drawers.

I recall that she showed me a recipe for Hup Tow Sou before or a type of melt in your mouth cashew nut cookies. She reminded me that hubby’s favourite cookie is that, and she has reserved the recipe in the event that one day she would be able to make it for him. She handed the recipe to me and asked me to give it a go, given that it is not often he comes home.

Now, I did try that recipe, twice in fact and I failed sooo miserably with it. I don’t even recall taking any photos or documenting it-probably due to it being such a failure (and u guys know I am not shy with documenting my challenges in baking) that it was too traumatic for me to remember it. Or perhaps, not wanting my mother in law to know that I didn’t succeed! Not that she would mind I am sure, but the self talk of being a new wife, and the bruised ego of not being even able to make my hubby’s favourite childhood cookie clouded over me for a while.

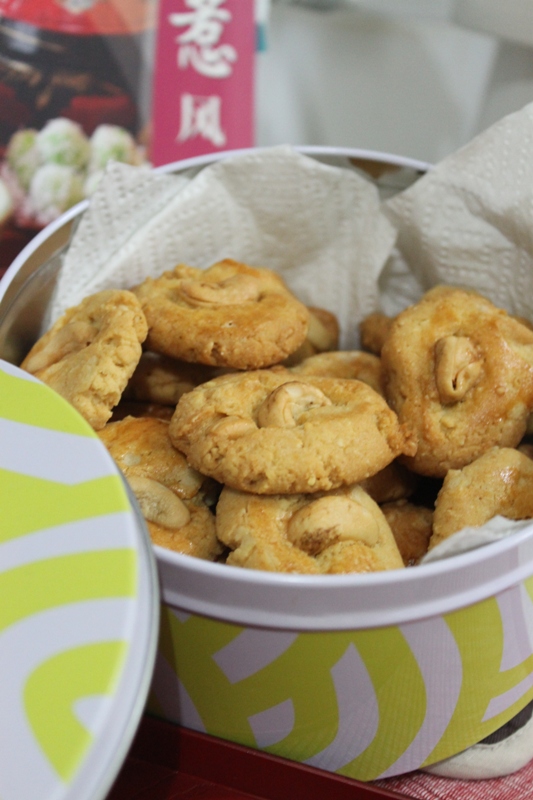
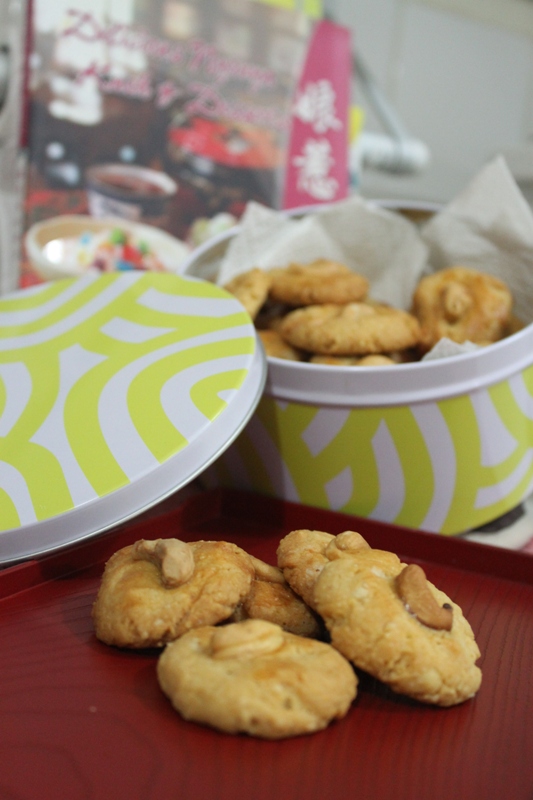
Exaggeration aside, I never did try attempting any other form of cashew nut cookies since then. Silly me really, because my mouth waters when Little Corner’s and Lily’s new year goodies posts came to mind. This time, I decided to go with a recipe from a book that I have other success from. It wasn’t the traditional Hup Tow Sou but it has a lovely crisp cashew nut flavour, with a melt in your mouth texture. I would say this has a more crisp texture as well.

You can imagine the relief that wash over me when the batch of cookies came out looking normal. ;P

Cashew Nut Cookies (makes around 50) 

250 grams butter
180 grams icing sugar
400 grams plain flour
1 tsp baking powder 
180 grams of ground cashew nuts (using nuts that were roasted)
1 egg yolk
1 tsp vanilla essence
100 grams of whole cashew nuts for garnishing

Egg wash- 1 egg yolk ( I used the whole egg)

Preheat oven to 160C. Line 2 or 3 baking trays with baking paper.

Sift plain flour and baking powder. In another bowl, cream butter and icing sugar together. Add in the egg yolk and vanilla essence. Flour flour and ground cashew nuts to batter. Mix well til it forms a dough. Shape dough in little balls using a tsp. Alternatively, you can roll it out and use a cookie cutter. Brush dough with egg wash and press a cashew nut on top. Bake for 20-25 mins.

Photobucket

Nata DeCoCo Coconut Jelly

Hot hot hot hot hot.

Perth has been going through a series of hot weather these days. One weeks like this, it’s difficult to spend time in a kitchen. I can totally understand why some people have air-conditioning in the kitchen! While having a few friends over for a bbq lunch one day, I decided to make Agar Agar for dessert instead. Agar Agar is a plant based gelatin which makes it suitable for vegetarian or Muslim friends.

To add texture, I used Nata DeCoCo, a coconut fiber. Once the first layer cooled, I was able to put in a 2nd layer, resulting in the dual flavour jelly. The 2nd layer was made up of coconut milk and agar agar. Hubby commented that this was addictive..and even our french friends were fascinated by such a simple but “different” (In their words!) dessert.


Nata DeCoCo Coconut Jelly

2 packets of Swallow brand agar agar powder. I used a green and plain one.
Sugar- I recalled using half of what the recommended amount was. 
180 grams of Nata DeCoCo (it comes in a can)
220 ml of coconut milk 

Following the directions on the packet, dissolve the plain packet of agar agar in water and sugar. Bring it to boil.

Meanwhile, start spooning Nata Decoco into the moulds.

When the mixture starts to boil, remove from heat. Cool slightly, spoon mixture into the moulds-filling it halfway.

Repeat. Over heat, dissolve the green agar agar powder with 1 cup of water, coconut milk and some sugar. Again, once it boils, remove from heat and cool slightly. By that time, the nata decoco layer would have firm up slightly. Spoon the coconut milk agar agar mixture to fill up the moulds. Cool and refrigerate.

Sending my little jellies to  Weekend Herb Blogging! It is hosted by Simone from Bricole– I’m intrigued by the dual language on her blog. Italian and English.

Photobucket

Tom Yum Sausage Rolls

I love the versatility of Tom Yum paste. My granny loves it more as she brought TWO big jars over from Singapore. One and a half jar still remains in our pantry. This means creative ways of cooking up Tom Yum!

While preparing for morning tea for my colleagues, I thought of a different twist to the usual sausage rolls. Adding tom yum to the mince mix! The result was a moist and tasty sausage rolls. Thankfully, my colleagues loved it as well as there were NONE left by the next day. It’s abit of a change as well, from bring sweets to savory to morning tea.

The roasted sesame seeds added an aroma and texture. Certainly goes well with tom yum!

Speaking of which, I would certainly appreciate more ideas for Tom Yum paste. Anything other than noodles, fried rice or sausage rolls! 😉

Tom Yum Sausage Rolls (makes around 20 mini rolls)

2 pieces of puff pastry defrosted
300 grams of chicken mince
2 tablespoon of Tom Yum paste
2-3 pieces of kaffir lime leaves chopped
1 cup of bead crumbs- I used dried but if you have stale bread to make into breadcrumbs, even better!
1 egg
2 tablespoon of corn flour
1 tsp of fish sauce
1 tsp of sugar
 2 tsp of toasted sesame seeds
Egg wash 

Marinate chicken with all seasoning for around 20 mins.
Preheat Oven 200C. 
Meanwhile, preheat oven and line baking tray with baking paper.Cut puff pastry into halves (lengthwise). Place sausage mixture in the middle. Egg wash all sides. Roll to seal. Cut into bite sizes. repeat for 3 other halves of puff pastries. Egg wash the top of the mini pastries and sprinkle sesame seeds. Bake for 25 minutes till golden brown.

Photobucket

Baked Pandan and Coconut Milk Cake

A very belated post. Late January, it was hubby and granny’s birthday. Turns out that this year, Granny’s Chinese birthday (according to the lunar calender) is the same as hubby’s English birthday!

On the day itself, hubby bought his own birthday cake. I felt so bad.. but work means that I did not get home till late that day. It was a sweet day though as granny waited till both hubby and I are back, staying up late to cut her birthday cake (Sharing with hubby of course). I rarely have the chance to celebrate granny’s birthday-given that I’m not in Singapore often. I think she senses it too, that despite my working hours, we sincerely want to spend it with her.

To make it up, I decided to make a cake that I thought will make both of them happy. It has to be something slightly different since granny isn’t a fan of sweet creamy cakes. I decided to adapt a Nyonya recipe from one of Andrew Kow’s cookbook “Nyonya Kuih with Passion”. It has coconut- so I know it will be a winner with hubby.

While I was making it, granny commented that it is unusual to be cooking the batter on the stove before baking it. Indeed. The batter will become very thick-like when one is making yam or radish cake.

The result is…. a happy granny and hubby. =)

Baked Pandan and Coconut Milk Cake

200 grams Rice Flour
80 grams mung bean flour
150 grams of sugar (reduced from 300 grams)
1400 ml of coconut milk (I used 1000 ml of coconut milk and 200 coconut cream)
20 grams of sago powder (omitted as I dont have it!)
pandan essence- around 2 tsp

Oil a square baking tin. Pre heat oven 180C.

Place all ingredients into a pot. Mix well and cook using medium heat. Keep stirring till the batter becomes thick. Bake for 30 minutes till it becomes golden brown on the top. Leave to cool. Cut into pieces and serve.

Photobucket

Roasted Pumpkin and Garlic Feta Dip

I have been experimenting with a few dips recently. A light bulb moment occurred when I was standing at the aisle of the supermarkets trying to find a dip with the least fat and preservatives. I realised then, that most of these dips are vege based and could be easily blended at home.

This was actually inspired by a chickpea/pumpkin dip that I bought a few months ago. Having a chat with my colleagues one day about myself trying to experiment with pumpkin as a dip, one colleague mentioned roasting the pumpkin while the other suggested using some roast garlic as well. For seasoning, I decided to use feta and abit of paprika.

The result was a sweet and tasty dip. Healthy too since I used only 2 tsp of the grapeseed oil from the feta cheese. The rest was lemon juice. I love how the feta and garlic added the flavour without over-powering it. I love this feta especially as it was bought from at one of my favorite market place Kalamanda Markets.

A bonus is the vibrant colour that this dip has. The roasted pumpkin and garlic releases it sweet flavours and showed of its bright shiny orange! Garlic is said to have its antioxidant properties whereas pumpkin is full of vitamin C. Hopefully this is a far healthier dip than we can buy from the markets.

Roasted Pumpkin and Garlic Feta Dip 

500 grams of Butternut pumpkin
2 big knobs of garlic seperated and scattered on the oven tray

Roast these on a baking tray 30 minutes on 180 heat.

Roasted garlic and pumpkin
20 grams of feta cheese
juice of 1 lemon
2 tsp of grapeseed oil
3 tsp of paprika
cracked pepper

Peel skin of garlic. Whiz all ingredients in blender for 30 seconds. Taste test and then adjust pepper accordingly. You may not need salt as feta is salty.

I’m sharing this with Weekend Herb Blogging this week. I have been waiting to participate in this event more regularly and this is my chance! This week it is hosted by Graziana from Erbe in Cucina.


Photobucket

Chocolate Caramel Brownie Hearts

We never have any luck celebrating Valentine’s Day. Perhaps it’s the nature of our relationship-that we emphasized on they daily choices rather than a big celebration on one day of the year. Or perhaps I just cannot justify how much flowers costs and think it is much more worthy spending it on something else. In fact, AR bought me a swarovski crystal rose because he said given my practical nature, I would enjoy a rose that never die instead. Besides, he figured that he probably saved more from not buying me roses on Valentine’s Day. He was right. A rose from the garden also suffice. In all honesty, to wake up smelling a fresh stalk of rose from our garden that he deliberately woke up earlier to cut was more meaningful than a big bulky bunch of store bought flowers.

I recalled when we first started dating, he gave me a puzzle mat for Valentine’s Day. He was traveling then, and called me to tell me that there was a present hiding underneath his bed, and that I have to pulled it out. Not the most romantic because he forgot to clean the dust under his bed!!!! And I bet our housemates was wondering why I was in his room looking underneath his bed. How suspicious that must have looked. In later years, we seem to spend Valentine’s Day separately due to different commitments like being overseas at the same time or having family members visiting. 

More recently, we opted to write each other cards and notes to remind ourselves how privileged is that to have one another. Even through arguing the little things like how busy our schedules are, how we manage our money to why we tend not to “listen” to each other-probably due to tiredness. Often, we learned the hard way that, regardless of whatever we said or did,  we do we have goodwill towards each other.  Valentine’s Day is about us respecting and loving one another. The cycle that never should end.


Sweet Valentine’s Day everyone!

Chocolate Caramel Brownie Hearts modified from Taste
80grams of butter (recipe called for 150grams)
150 grams of dark chocolate (I used a mixture of mint chocolate and chocolate with cherry liquor in them)
1/4 cup of caster sugar (recipe called for 
1 1/4 cup of plain flour 
2 eggs
2 tsp of cocoa powder 
220 grams of Cadbury Carmello chocolate blocked (I put it in the fridge for a few hours before chopping them into small pieces) 
Preheat oven 180C. Line a slice tray with baking paper. 
In a sauce pan, melt chocolate and butter. Fold in sugar when the mixture has been combined. Cool for a few minutes. 
Meanwhile, combine flour and cocoa powder together. 
Whisk 2 eggs, Slowly whisk 2 eggs into the sauce pan to chocolate mixture. Then fold in the combine flour/cocoa powder. Fold in carmello chocolate bits. Pour into prepared tray and bake for 15-20 minutes till top is set. 
Cool. Cut using heart shape cutters and dust with cocoa powder. Resist munching on the leftover bits! Caution, despite this recipe saying that it is a brownie, I think it resembles a truffle instead and is quite rich.

Sending my love to Aspiring Bakes #4 Love Is In The Air Series!  The host is Ellena this month, with a theme of “Heart Shape”.

Photobucket

Grass Jelly Dessert

Growing up in Singapore, one of my favourite drink in the markets is Chin Chow or Grass Jelly. It’s really a herb that is made into a jelly form and has “cooling” properties to cool down on a hot day.

Perth is going through a pretty hot summer this year, with 38/40C days. Sometimes, I feel like I’m being “cooked” underneath the hot sun.

Although we can purchase cans of grass jelly drinks, I noticed a packet of grass jelly powder that can be cooked easier on the stove top. It sets and becomes big blob of jelly-similar to what we can buy in supermarkets in Singapore. I love to have them in large cubes and eat it like a dessert rather than it being a drink.

Another alternative that I have yet to try-and maybe I could during winter, is to make this into a warm dessert. A Taiwanese eatery in Perth sells this with red bean and tapioca pearls. Ahhh.. warm desserts rocks as well.

In the meantime, granny taught me how to make a cool syrup using pandan leaves, and a mixture of rock and brown sugar.

Grass Jelly Dessert(Serves 5-6)

1 packet of Grass Jelly powder
1 can of logans

Follow instructions on packet. Set the grass jelly.

Syrup
500 ml of water
1 cup of brown sugar
1/2 cup of rock sugar
3-4 pandan leaves tie in a knot

Simmer ingredients till it becomes slightly thick. Around 10 serves.

Spoon grass jelly in bowls, Add logans and syrup. Serve cold. If you want, you can use the syrup from the logan can instead of simmering one yourself =)

Photobucket

Prawn Pad Thai

We attended a dinner bbq party recently and met a Thai style cooking chef there. He was kind enough to give me a verbal run down on how he cooks Pad Thai. It seems easy enough, and given that I have tried it before, I thought I should give it another go. I felt that this version did not have enough gravy. It seems that each time I made pad thai, I will run out of something. The last time, it was fish sauce, this time, I realized I did not have brown sugar on hand! What a waste.. grrr.. I really have to be a more organize cook.

The chef also gave me a tip on presentation. He said that by adding a little cornflour/water mixture into the beaten egg, it provides a better “spring” to the omelette, allowing it to stretch and accommodate the noodles without breaking. I lined a bowl with the omelette and place some noodles in it. I fold the egg, pop a place on top of the bowl, flip it over and ta dah, a nicely omelette wrapped noodle dish. I scored it and sprinkle some peanuts in it.

The alternative method, is to make the omelette, roll it up and sliced it. I find this way much simpler but it was always interesting to try something new! 

Prawn Pad Thai (Serves 6) 

200 grams prawn meat 

sauce
around 6-8 pieces of tamarind
500 ml of water 
1/4 cup of brown sugar

pad thai noodles soaked in normal tap water till soft

Seasoning- mix together in a jar
1/4 cup of fish sauce
1/2 lemon juice
1 tsp of sugar

1 tablespoon of garlic
1./2 red onion
few bunches of spring onion sliced.
2 cups of bean sprouts
roasted peanuts

Cook sauce first. Simmer ingredients till it becomes thicker. Do a taste test. Adjust accordingly.

Fry garlic, onion and prawns. Remove prawns from pan. Fry noodles and veges. Add simmer sauce ladle by ladle till absorb. Continue to do so for around 10 mins or so. Add the fish sauce/lemon juice/sugar mixture. Do a taste test and adjust. Add the prawns back. Toss and serve quickly.

Omelette (For one-repeat if needed)
2 eggs 
1/2 tsp of corn flour mix with a little water

beat eggs with corn flour mixture. Cook omelette on a oiled pan. Flip after around 3-4 mins.

Presenting this to the great people at Presto Pasta organized by Ruth from Once Upon A Feast. This week, it is hosted by Helen from Fuss Free Flavours. It’s the 200 presto pasta bash this week!

Photobucket

Apple Coconut Cake

When Piggy’s Cooking Corner posted this gorgeous cake, I knew I had to give it a go. It has NO butter and has my hubby’s favorite coconut. Ironically, I brought this cake to work for our morning tea Tuesdays, saved a few slices and then brought it home again! Poor hubby having to wait for the cake.

Well, it did not disappoint. It was moist and tasty. I have NO idea how come my cake turned out darker than Piggy’s. I think granny and I may have over did the jelly glaze. At first I thought I over baked it, but the inside was done perfectly. I saw Amber’s version and it looked similar to hers. Nevertheless, we loved it and this recipe is definitely a keeper.

LOVE Doris Greenspan!

Apple Coconut Family Cake

1 cup of flour
2 tsp baking powder
1/4 tsp baking soda
1/4 tsp ground cinnamon (I added 1 tsp)
pinch of salt
3 apples
2 large eggs in room temp
1/2 cup of sugar plus some for topping
1/2 cup of plain yogurt
6 tablespoon of oil (I used olive)
1 tablespoon of rum extract
2 tsp of vanilla extract
1 cup of dried shredded coconut. I used the fine ones.
about 2 tablespoon of jam, warmed up with 1 tablespoon of water.

Preheat Oven 180C. Line 9 inch baking cake tin with baking paper.

Whisk flour, baking powder and soda, cinnamon and salt in a large bowl.

Cut 2 apples into bite size pieces. Set aside. Cut the third apple in slices.

In another bowl. Whisk eggs and sugar. Whisk in yogurt, oil, rum and vanilla. Fold flour mixture into this wet mixture slowly. Then fold in coconut and diced apple.

Pour cake mixture into tin and jiggle it for evenness. Arrange sliced apples on top of cake. Sprinkle some sugar (I used raw sugar). Bake for 45-50 mins.

Cool the cake. Remove tin and glaze with jam.

Photobucket

Art of Making Dumplings

It’s funny how some childhood food sticks in your mind. I have made a similar version before but nothing beats the fun and laughter than I have when making these with my grandmother. As a child, I would often request if I could wrapped the filling into the rounded dumpling wrappers. She would reluctantly agree. And she would point out that because I didn’t wrap it tightly, the filling spills out. I would argue with her and said how would she know if I was the culprit and not hers since we did them together? ;P

But now she is here, and when she gathered up the ingredients, I know the fun begins again. My turn to wrap some prawn dumplings with her. It’s perfect timing because today is New Year’s eve, and I know we will be having these for our steamboat (Chinese soup fondue) dinner.

We marinate the meat. Granny was very generous with the dried mushrooms. Defrosted some prawns, prepared the egg wash and here we go!

Place a teaspoon of filling into the middle of the wrapper. Place half a prawn in the middle.

Dot egg wash around the edge of the wrapper.

Seal.

Pose.

Repeat. 

While I was finishing them up, granny proceeded to make the stock and noodles for our soup.

The result of our work! Lovely juicy prawn dumplings!


Prawn Dumplings (makes around 30 dumplings)
300 grams pork mince
5-6 hydrated shitake mushrooms chopped finely
2 tablespoons of DOM liquor 
dash of white pepper 
2 tablespoon of light soya
dash of salt
1 tsp of corn flour

Around 15 prawns halved.

30 dumpling pastry.

Marinate meat with ingredients. Follow the above instructions. Boil stock. Cook prawn dumplings for around 5-6 minutes. Serve hot with chili!

HAPPY CHINESE NEW YEAR!!!!! MAY THIS YEAR BRING YOU AND YOUR FAMILY MORE LOVE AND PROSPERITY!!! 

Photobucket

Design a site like this with WordPress.com
Get started